07 November 2025
Before a single frame of animation is created, there’s a quiet but crucial step that determines the entire direction of the final piece: storyboarding. The storyboard process is where ideas become visual narratives, shot by shot, scene by scene, so the animation team has a clear blueprint to follow.
Think of it as the bridge between script and animation.
What Is a Storyboard in Animation?
A storyboard is a sequence of illustrated panels that map out how the animation will look and flow. It includes:
- Scene composition
- Camera angles
- Character poses and expressions
- Key transitions
- Timing notes
- Dialogue / voiceover / sound cues
Storyboards don’t need to be beautiful artworks, they just need to communicate the idea clearly. This is where storytelling clarity is born.

Storyboard reference copies used on set during the filming of The Empire Strikes Back in 1979. The original storyboards were created by artist Joe Johnston. Photo by: Matt Popovich
Why Storyboarding Matters
Without a storyboard, animation becomes guesswork — and guesswork is expensive.
The storyboard process helps: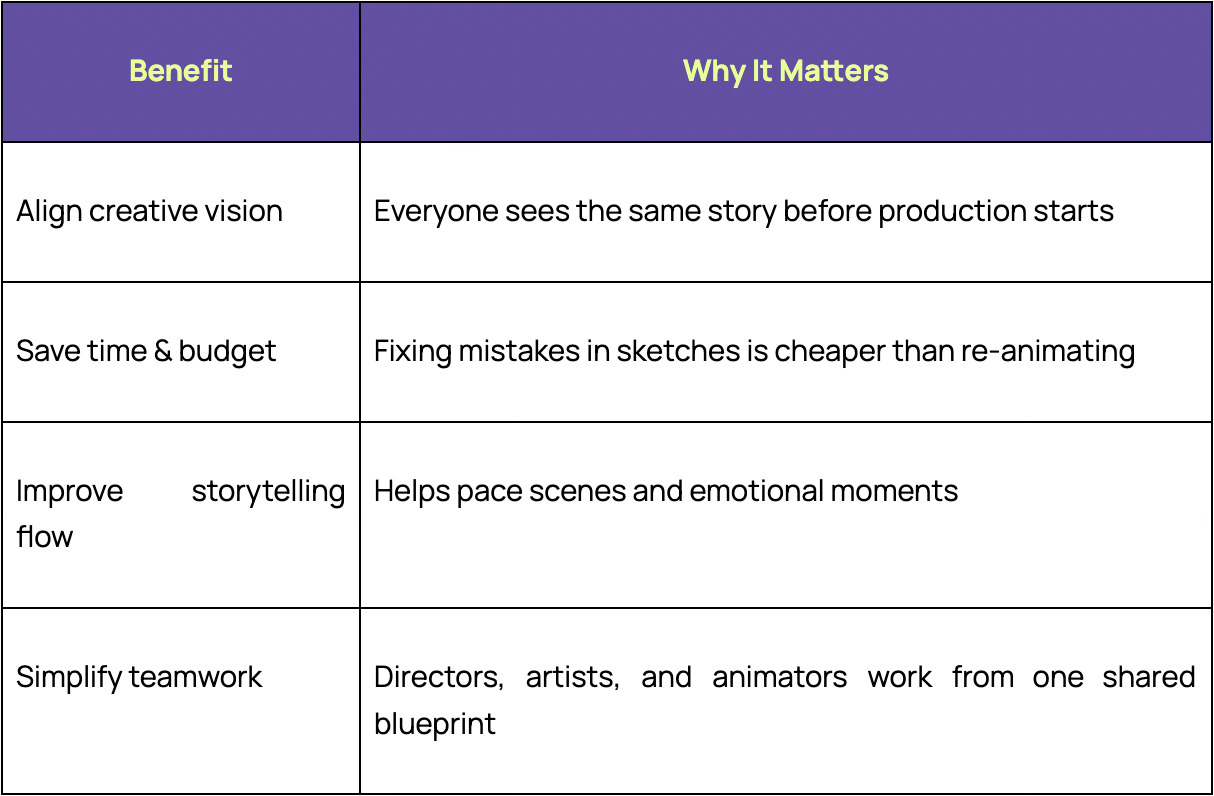
In short: storyboarding prevents chaos.
Storyboard Process for Animation (Step-by-Step)
1. Understand the Script or Core Idea
Before drawing anything, the creative team clarifies:
- Characters and their motivations
- The emotional arc
- Key message or theme
This alignment keeps the story purposeful.
2. Break the Script Into Scenes
The story is divided into logical visual beats.
Each beat represents a moment of change — in emotion, action, or environment.
3. Sketch the Key Frames
The storyboard artist draws the main shots of the story.
Key considerations:
- Character poses
- Camera framing (wide shot vs. close-up)
- Background environment
- Scene direction/movement
It doesn’t need to be perfect, just clear.
4. Add Notes, Arrows, and Timing
This is where clarity is built.
Common notes include:
- Movement directions (↗ ↘ ↺)
- Camera pans or zooms
- Voice lines or narration timing
- Emotional tone (“tense,” “quiet,” “excited”)
Animation is visual storytelling, details matter.
5. Create an Animatic (Optional, But Highly Recommended)
An animatic is a rough video version of the storyboard, synced with:
- temporary audio
- pacing
- transitions
- early sound cues
This reveals whether scenes flow well before animation begins.
If something feels too long, too fast, or unclear, it gets fixed here.
6. Final Review & Approval
Once the story feels visually coherent and emotionally strong, the team approves the storyboard and moves on to:
- Design
- Layout
- Animation
This is where production finally begins, confidently.
The storyboard process is the strategic foundation of successful animation. It aligns vision, saves time, and strengthens storytelling before production even begins.
If you're planning an animation and want help shaping your story visually, our creative team can support you from concept to final animation.
👉 Get in touch with us to discuss your storyboard or animation project
Frequently Asked Questions
1. Do I need to be a professional artist to create a storyboard?
No. Clarity is more important than detailed drawing.
2. How detailed should a storyboard be?
Detailed enough to communicate the action, mood, and camera flow, not enough to slow down momentum.
3. What software is commonly used?
Toon Boom Storyboard Pro, Photoshop, Procreate, Blender Grease Pencil, or even pen & paper.
4. Is an animatic necessary?
It’s not mandatory, but it saves time during animation by solving pacing early.
Visit Us
Mactaggart Building, 42 Mactaggart Road,
#02-01E, Singapore 368086
Contact Us
© Elevate Future Labs Pte. Ltd. 2026
